Introduction
MongoDB is an open-source NoSQL document database that provides high performance, high availability and easy scalability. |
| Diagram 1. Replicaset across multiple servers |
I will implement a Role-Based Access Control to manage access to the MongoDB services. This will include an Admin for obvious administration purposes and a user which will be used for the Application only.
MongoDB gameplan
MongoDB instances run on different ports. For this setup we will use the following schema:
- Port 27017 (default port) - Primary instance in Data Center 1, Server A.
- Port 27020 - Secondary instance in Data Center 1, Server A.
- Port 27030 - Secondary instance in Data Center 2, Server B.
These ports must be allowed in the TCP Firewall rules. If you want to use the Webbased monitoring page, allow 28017, 28020 & 28030 (+1000) as well.
Think about a name for the Replica Set. In this tutorial I will use: "replicaset"
Our Database Admin User will be: "admin".
The Application User will be named: "appuser"
Download and install MongoDB
Download the MongoDB ZIP here: http://www.mongodb.org/downloads, I prefer the ZIP instead of the installer, because MongoDB is a standalone application and I want full control. Unpack the contents in for example: D:\mongodb\ so you will see D:\mongodb\bin\. This must be done on all MongoDB servers. While we are here, create:
- D:\mongodb\data\replicaset-PORT\ (where PORT is a placeholder for the used port)
- D:\mongodb\log\
MongoDB Configuration File
Configuration settings can be stored in a config file. The file extension can be random, but using .cfg would be a sane choice.
- On Server A create file: D:\mongodb\replicaset-27017.cfg, with the following lines:
- dbpath=D:\mongodb\data\replicaset-27017
- logpath=D:\mongodb\log\replicaset-27017.log
- logappend=true
- port = 27017
- replSet = replicaset
- # keyFile=D:\mongodb\replicaset.key
- bind_ip = 127.0.0.1,SERVERA,local
- On Server A create file: D:\mongodb\replicaset-27020.cfg, with the following lines:
- dbpath=D:\mongodb\data\replicaset-27020
- logpath=D:\mongodb\log\replicaset-27020.log
- logappend=true
- port = 27020
- replSet = replicaset
- # keyFile=D:\mongodb\replicaset.key
- bind_ip = 127.0.0.1,SERVERA,local
- On Server B create file: D:\mongodb\replicaset-27030.cfg, with the following lines:
- dbpath=D:\mongodb\data\replicaset-27030
- logpath=D:\mongodb\log\replicaset-27030.log
- logappend=true
- port = 27030
- replSet = replicaset
- # keyFile=D:\mongodb\replicaset.key
- bind_ip = 127.0.0.1,SERVERB,local
Explaining the configuration file:
- dbpath: this is the directory where MongoDB will store the data. Each member of the Replica Set will have its own folder. If this folder does not exist MongoDB will not start.
- logpath: this is the file where MongoDB will send all diagnostic logging information. If file not present, MongoDB will create the file as configured in the configuration file. MongoDB will overwrite the log file each time the process starts. To append these entries, simply add "logappend=true" to the file.
- port: this specifies the TCP port on which MongoDB listens for client connections. Default value is 27017.
- replSet: name of the Replica Set. All members in the Replica Set must share the same name.
- keyFile: this is the file where the secret key is stored. This is used by MongoDB instances to authenticate in a Replica Set (and Sharded Clusters). The secret key can be a random string between 6 and 1024 (base64) characters, I will use extension .key for this file. This property will be commented out until the Admin user is set.
- bind_ip: MongoDB will bind to this IP address. It is possible to bind to multiple IP addresses, by entering a list of comma separated values. Using hostnames is allowed.
Create MongoDB keyfile
The keyfile is the file containing the secret key needed by multiple MongoDB instances from the same set or cluster to authenticate with each other.
- Create file: D:\mongodb\replicaset.key
- Extension key is random, but makes sense.
- Open file and write a random string
- between 6 and 1024 (base64) characters
- Save the file
Install MongoDB services
Install the 3 MongoDB instances as a service. From D:\mongod\bin\
- Server A, Port 27017
- mongod --config "D:\mongodb\replicaset-27017.cfg" --install --serviceName "MongoDb-replicaset-27017" --serviceDisplayName "MongoDb-replicaset-27017"
- Server A, Port 27020
- mongod --config "D:\mongodb\replicaset-27020.cfg" --install --serviceName "MongoDb-replicaset-27020" --serviceDisplayName "MongoDb-replicaset-27020"
- Server B, Port 27030
- mongod --config "D:\mongodb\replicaset-27030.cfg" --install --serviceName "MongoDb-replicaset-27030" --serviceDisplayName "MongoDb-replicaset-27030"

The serviceName and the serviceDisplayName can be seen in the properties of this service:
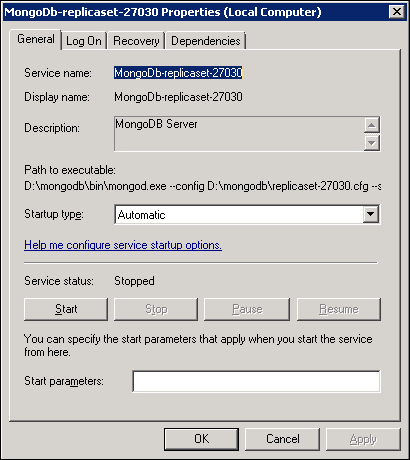
- Check properties: Run > services.msc, Click on a Service > Properties
- On all 3 MongoDB services, click on Start to start the MongoDB instance.
- Or from command line:
- net start "MongoDb-replicaset-27017"
- net start "MongoDb-replicaset-27020"
- net start "MongoDb-replicaset-27030"
- Make sure the Startup type is Automatic and the Service status stays "Started". If not, something is wrong and you have to review your log and configuration.
Configure MongoDB Replica Set
- Connect to the primary Mongo instance on port 27017 using command prompt.
- From: D:\mongodb\bin\
- mongo --port 27017
- Initialize Replica Set:
- rs.initiate()
- Common error is "couldn't initiate : can't find self in the replset config my port: 27017". This means your configuration file is wrong in the bind_ip parameter. Make sure the IP or hostname value from the "me" parameter is included in the bind_ip. Don't forget to stop and start the service again.
- Add Secondary Replica Set members
- Connect to each Secondary Mongo instance in a separate command prompt
- On Server A. Secondary:
- rs.add("HOST:27020")
- HOST must be the IP or Hostname from the bind_ip parameter.
- When you get the following error: "Error: assert failed : no config object retrievable from local.system.replset", then rs.add the hosts on the Primary member (27017)
- On Server B. Secondary:
- rs.add("HOST:27030")
- Check current Replica Set configuration:
- rs.conf()
- Here you can view current members. Your prompt should be stating "replicaset:PRIMARY"
- Check status of Replica Set:
- rs.status()
- Here you can view the id, name, health, state, stateStr, etc of each member within the Replica Set.
Set Priority between MongoDB instances
When a MongoDB instance within a Replica Set becomes unavailable, elections will occur to assign new statuses. If the Primary is down, One of the Secondaries will become Primary. While there is no Primary, no writes can occur. A Primary is seen as down after a 10 second timeout.
By setting Priority, members will vote for a member with the highest priority first. Members with priority value of 0 can never be elected as primary. An Arbiter can only vote.
To set priority connect to the Primary instances and issue these commands:
- rs.conf()
- check the values from the "_id". Our Primary (on port 21017) has _id: 0. The Secondaries have _id: 1 and 2.
- cfg = rs.conf()
- cfg.members[0].priority = 2
- give member with _id 1 a priority of 2 (highest in this set).
- cfg.members[1].priority = 1
- cfg.members[2].priority = 1
- rs.reconfig(cfg)
- Save the new configuration
MongoDB basic User Management. Add users.
Before enabling authentication, I will add an Admin user and a user for the application. It's good design to split these. I will make another tutorial with more in-depth information about User Management. For now this will do in our current setup.
While connected to the Primary instance:
- Add Admin:
- use admin;
- db.createUser({user: "admin",pwd: "ourpassword",roles:[{ role: "dbOwner", db: "admin" },{ role: "readWrite", db:"admin" },{role: "root", db:"admin" },{role: "__system", db:"admin" }]})
- Instead of role: root, you can use role: userAdminAnyDatabase to limit some roles.

- Add User "appuser" to its own database.
- use application (make database "application" active)
- db.createUser({user: "appuser", "pwd": "anotherpassword", roles : [{role: "readWrite", db: "application"},{role: "dbAdmin", db: "application"}]})
- User appuser has two roles: dbAdmin & readWrite on database "application"
Enable Authentication
Now everything is in place, we can enable authentication between the MongoDB instances within this Replica Set.
- Stop all 3 MongoDB services. On all Servers and/or Instances
- On all instances:
- use admin
- db.shutdownServer({timeoutSecs: 60});
- exit
- Edit Configuration File in D:\mongodb\
- Uncomment the keyFile line by removing the # before keyFile.
- Start all 3 MongoDB services using the "net start" command or "run > services.msc".
- You can now connect as Admin user from D:\mongodb\bin\:
- mongo --port 27017 -u admin -p ourpassword --authenticationDatabase admin
- Or connect as the Application User "appuser"
- mongo --port 27017 -u appuser -p anotherpassword --authenticationDatabase application
Now we are set!